
There are many different versions of Android Phone. This manual just show one of its versions. You may use either Mail or Gmail App for the setting, simply follow the same logic to fill the information.
-
1. Enter the Mail/Gmail Application
On the Home Screen or Application Menu, click the Mail/Gmail app. -
2. Add Account
Note: If you already have another account set up, tap the hamburger menu (3 horizontal lines) on the left side of the Inbox. Click the gear icon in the top right and then click + Add account. You'll now see the screen as shown in the screenshot below.
-
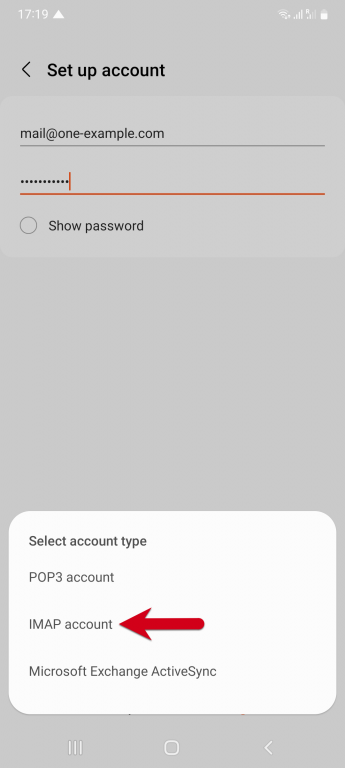
3. Enter your account information
- Email (The Email address you set on DirectAdmin panel.)
- Password (The password you set for this account when creating it on the DirectAdmin panel.)

-
4. Choose account type as “IMAP”
-
5. Enter your Incoming Server (IMAP) information
- Incoming Server(IMAP):
-
Important Note: Please refer to the Welcome Email of the Corporate Email Service for the server name. User who has subscribed SSL service may use customized server name
m154.bbcserv.com
m136.bbcserv.com
Port Number: 993
Encryption: SSL - Email (The Email address you set on DirectAdmin panel.)
- Password (The password you set for this account when creating it on the DirectAdmin panel.)

-
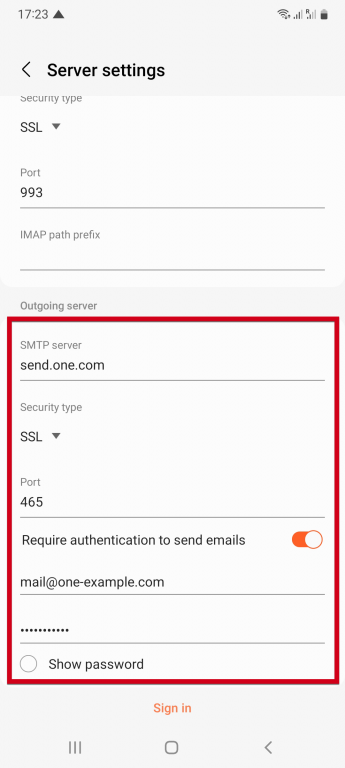
6. Enter your Outgoing Server (SMTP) information
- You MUST fill the same information on both IMAP mail server & SMTP Outgoing Server. Although it stated "Optional", but it MUST be filled.
- The information fill on these 2 parts MUST be completely the same.
-
Outgoing Server (SMTP) :
Important Note: Please refer to the Welcome Email of the Corporate Email Service for the server name. User who has subscribed SSL service may use customized server name
m154.bbcserv.com
m136.bbcserv.com
Port Number: 465
Encryption: SSL - Email (The Email address you set on DirectAdmin panel.)
- Password (The password you set for this account when creating it on the DirectAdmin panel.)
-
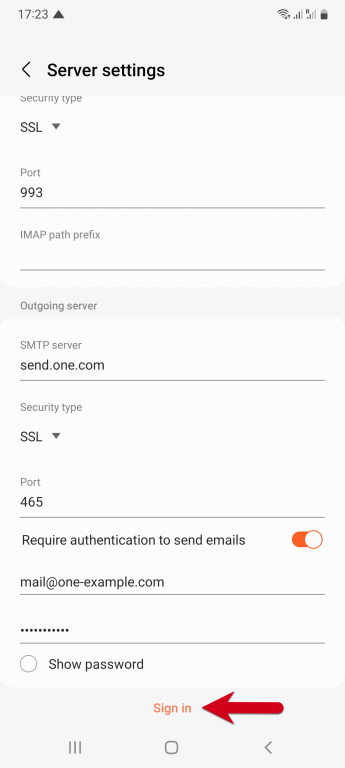
7. Click "Sign in" to complete setup
-
8. Setup is completed


